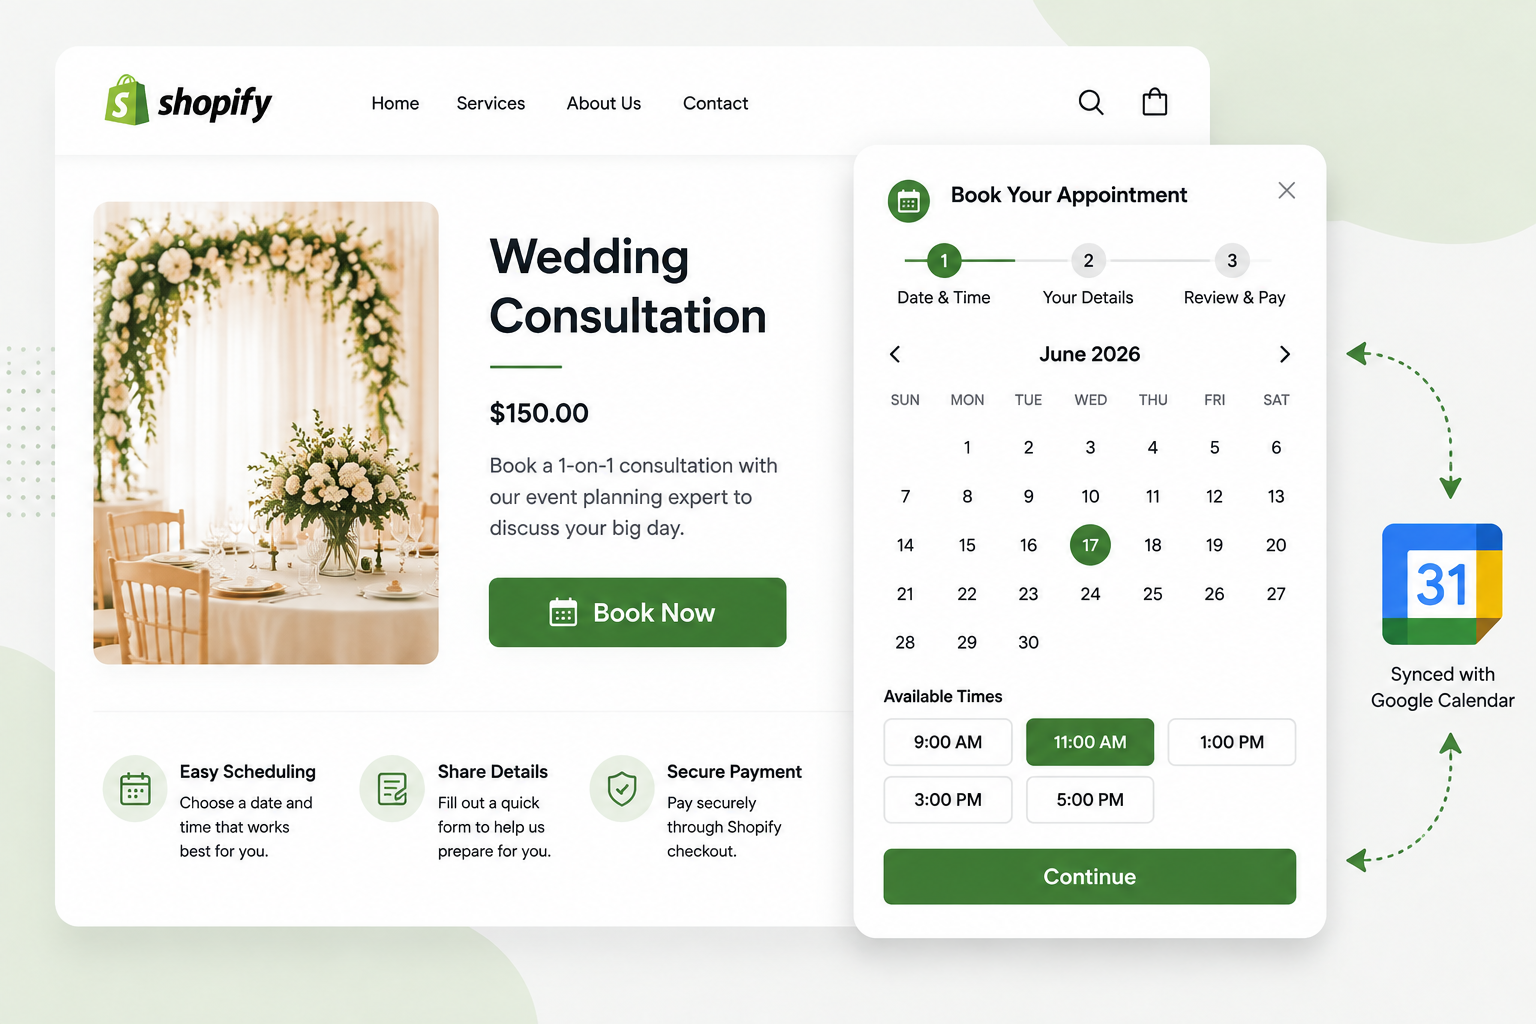
Shopify does not include native appointment scheduling. For a service business that needs customers to book before paying, you need a third-party booking app. The booking app category is one of the better-developed areas of the Shopify ecosystem, with several apps covering everything a wedding or events business needs: Google Calendar sync, customer-facing booking calendars, intake forms, deposits, add-ons, and setup support.
Shopify was built for selling products, not managing calendars. Scheduling is left to third-party apps, which plug into Shopify's existing checkout and order infrastructure rather than replacing it.
How Booking Apps Work on Shopify
Booking apps convert Shopify products into bookable services. Instead of an Add to Cart button, the product page shows a Book Now button that opens a scheduling interface. The customer selects a date and time, fills in intake form questions, chooses any add-ons, and completes checkout. The booking is recorded in both Shopify's order system and the app's calendar.
This matters because your bookings are Shopify orders. Payment goes through Shopify Payments or your existing gateway. Customer data lives in your Shopify customer profiles. Refunds and cancellations work through Shopify's normal order management. The booking app adds scheduling logic and calendar management on top of Shopify's existing infrastructure rather than replacing it.
Google Calendar sync is handled by the app, not Shopify natively. Most booking apps sync via OAuth, meaning confirmed bookings appear in your Google Calendar automatically, and blocked times in your Google Calendar prevent double booking in the app.
What Matters for a Wedding and Events Business Specifically
Multi-day and custom duration bookings. A wedding consultation might be 2 hours. The event itself might be an all-day block. An app that only supports fixed-length slots will not work. Look for apps that support custom booking durations, time blocks, and multi-day bookings.
Intake forms with detailed questions. Before the first consultation, you want to know the event date, number of guests, venue, budget range, and style preferences. Intake forms should support multiple question types: text fields, dropdowns, checkboxes, and file upload for mood boards or venue contracts.
Deposit or partial payment support. Wedding businesses typically collect a deposit to hold the date, with the balance due later. Some apps support deposits natively. Others collect full payment at booking, which does not work for this industry. Check this before installing.
Buffer time and blocked dates. After an event you likely need buffer time before the next one, and the ability to block specific dates for external commitments.
Two-way Google Calendar sync. One-way sync pushes confirmed bookings to Google Calendar. Two-way sync also reads blocked times from Google Calendar so manually added events prevent those slots from being offered to customers. For a business transitioning from Google Calendar, two-way sync is the version you need.
Add-ons or packages. Customers should be able to add services during the booking process, with the add-on price included in the total.
Questions to Check Before Installing
What is the minimum booking notice required? If you need at least two weeks notice, can you configure that?
Can intake form answers be seen without opening each booking individually? For a busy events business, scanning all upcoming bookings and their answers in a list view matters for planning.
What happens if a booking needs to be rescheduled? Check whether the customer can self-reschedule, whether you are notified, and whether intake form data carries over.
Does it send automated reminders? Automated email or SMS reminders reduce no-shows for consultations significantly.
Is there a booking volume limit on the plan you need? Some apps charge per booking, which can become expensive in a busy season. For a wedding business with variable volume, flat monthly pricing is generally safer.
Apps Worth Evaluating for This Use Case
Rather than recommending a single app, here are some of the most established booking apps on the Shopify App Store. Each offers a different balance of features, making it worth comparing them against your specific booking workflow.
Appointo offers a broad feature set for service businesses, including custom intake forms, Google Calendar sync, multi-day bookings, automated reminders, customer self-service, and group appointments. It integrates directly into Shopify's checkout, making it a strong all-in-one booking solution.
Cowlendar is designed for quick setup while supporting features such as custom booking durations, deposits, multi-day bookings, group bookings, and integrations with Google Calendar, Outlook, Zoom, and Microsoft Teams. It is worth considering if you want to start accepting bookings with minimal configuration.
Meety includes advanced booking capabilities such as deposits, bundles, waitlists, custom intake forms, customer portals, and integrations with Google Calendar, Outlook, Zoom, Microsoft Teams, Klaviyo, and Zapier. Its extensive feature set makes it suitable for businesses with more complex scheduling requirements.
BookThatApp (BTA) is one of the longest-established booking apps on Shopify. It supports a wide range of booking scenarios, including appointments, rentals, classes, and events, and has a reputation for handling more complex booking workflows. Merchants also frequently highlight the quality of its customer support.
For a wedding and events business, deposit collection is worth verifying on every app you evaluate. Some apps collect the full booking amount at checkout and do not support partial payment natively. Confirm deposit support before setup rather than after.
Setting Up the Booking Flow in Shopify
Create a product in Shopify for each type of service you offer. For a wedding business this might be: Initial Consultation, Full Day Event Coverage, Half Day Event Coverage. These products do not need an Add to Cart button since the booking app replaces that.
Install the booking app and connect it to the relevant products. Configure your availability: working hours, buffer times, and recurring blocked periods. Block dates for existing commitments using either the app's calendar or by syncing from Google Calendar. Set up intake form questions, keeping them to what you will actually use before the first consultation. Configure any add-ons.
Test the full booking flow end to end before going live. Place a test booking, check that it appears in your Google Calendar, and verify the confirmation email and intake form data are correct.
Migrating From WhatsApp and Google Calendar
Import existing bookings into the app's calendar as blocked time. You do not need to recreate them as bookings in the app — blocking the dates and times prevents the app from offering those slots to new customers.
Announce the new booking system to existing clients and keep the WhatsApp line active for the first month to catch anyone who misses the announcement or is not comfortable with online booking. Review the first few bookings in the app admin to confirm intake form data and calendar sync are working correctly before relying on it fully.
The Bottom Line
Shopify can handle appointment bookings, but only with the right app. Identify your requirements first — deposits, two-way calendar sync, intake forms, multi-day bookings — then evaluate apps against those requirements rather than by rating alone. Most apps offer a free tier or trial, which makes it practical to test your specific booking flow before committing.
If the store also sells physical products alongside services, the article on setting up custom gift box options in Shopify covers how line item properties and custom options work at checkout. And if you plan to send a tailored confirmation email with event-specific details after a booking, the article on sending custom emails for specific products in Shopify covers how to customise the order confirmation that goes out after checkout completes.